Posted in Tutorials · 10 min read
Simplify Magento 2 development with GitOps
Magento 2 has a bad reputation for being difficult to install and manage due to its modular architecture and complex system requirements. If not configured correctly, you'll end up with terrible performance and a slew of other problems.
In this tutorial, we'll use ProperHost's managed cloud container platform to deploy a Magento 2 site and streamline our development process using Git and CI/CD, also known as GitOps.
Prerequisites
Before you continue, make sure you do the following:
- Sign up for a free account on ProperHost Cloud
- Get authentication keys for the Magento Composer repository
Introduction
Normally, in order to install Magento you will need to set up a server, create a database, and upload the Magento source code using either FTP or Composer before you can even run the Magento installer.
On ProperHost Cloud, the above steps are fully automated. All you have to do is fill out a simple 3-step wizard, and the system will provision a new Magento installation as microservice containers inside a Kubernetes cluster, complete with version control, Git deployments, and built-in staging functionality.
You can also follow this tutorial to migrate an existing Magento site to ProperHost Cloud.
Let's get started...
Step 1 - Create new site
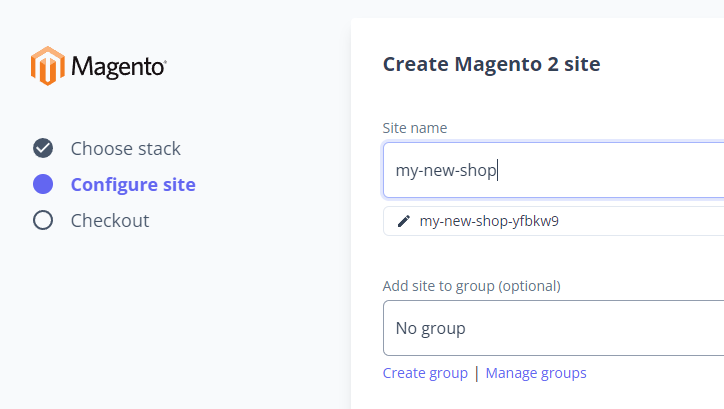
After signing in to the ProperHost Cloud Dashboard, click on "Create" to bring up the New Site Wizard. Choose "Magento 2" as that's what we'll use in this tutorial, but we also support Magento 1/OpenMage.
The application type you choose determines which components and services are going to be deployed. On the next page, type in a name for your new site. A temporary URL is automatically generated in case you don't have a domain yet.
Fill out the following settings:
- Composer authentication: enter your authentication keys, which you obtained in the previous step. The system needs to download Composer dependencies as part of the CI/CD build pipeline, which will fail if you don't have the correct credentials.
- Magento version: by default the latest version of Magento Open Source will be installed. If you already have a site you can select "Skip installation" to upload the existing codebase.
- Administrator account: enter your email and a username/password (optional) for the default Magento admin account. If you leave this blank, the system will generate a strong, random password for you (recommended).
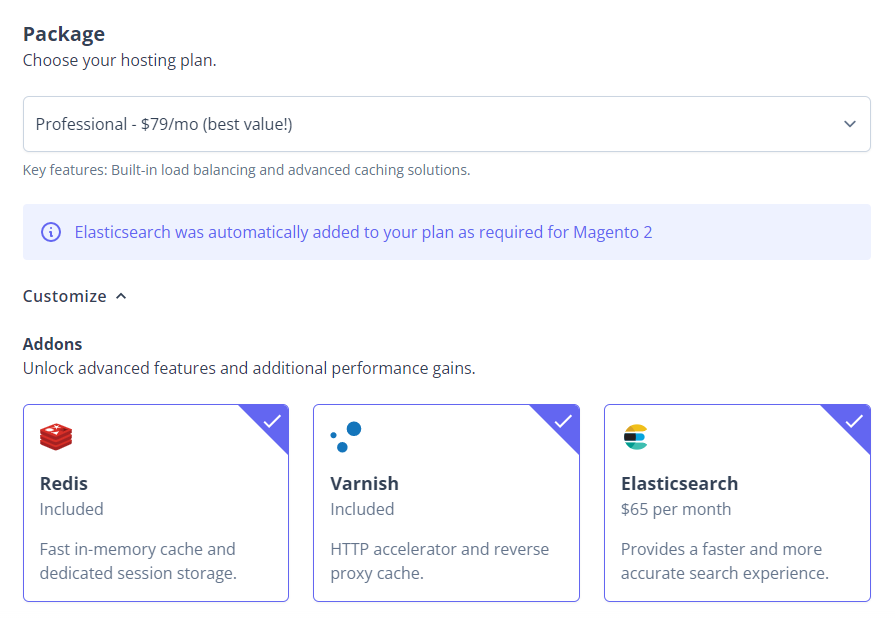
Step 2 - Select addon services
Magento 2 integrates with Varnish, Redis and Elasticsearch. As of Magento 2.4+, Elasticsearch is mandatory, while Varnish and Redis can be optionally enabled. Sites with lots of traffic will benefit from the additional performance gains provided by Varnish and Redis Cache.
Fortunately, this requires zero configuration from the user as the platform automatically detects available addons and applies the necessary changes.
Next, select your hosting plan and fill out your billing information to proceed. The system will now provision the required components and services, create a Git repository, and install Magento (if selected in the previous step).
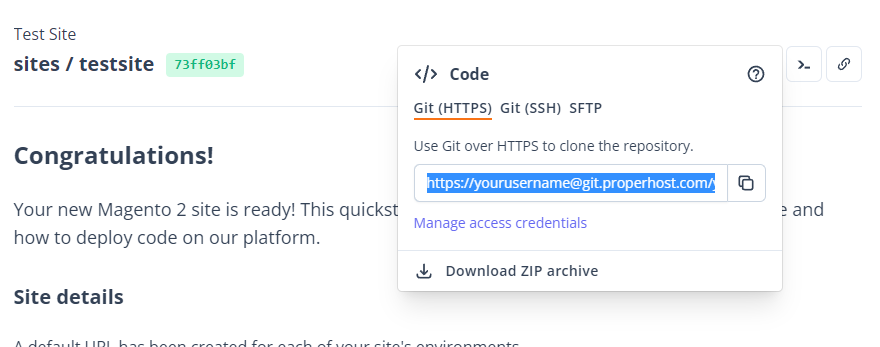
After a couple of minutes you will be taken to the Site Dashboard and Quickstart Guide, which contains the Magento admin credentials and other important information pertaining to your site. For an overview of the ProperHost Cloud UI, checkout this article.
Step 3 - Deploy your site
In this step we'll set up the local development environment and demonstrate the Git-driven deployment workflow. Before you proceed with this step you need to set up your Git authentication credentials from the "My Account" page in your ProperHost Cloud Dashboard.
General workflow
ProperHost Cloud uses Git as the source repository and version control system. When you create a new site, a new repository is populated with the default files provided by the application template.
Whenever you want to make a change to your code files, the workflow is as follows:
- Synchronize your local workspace.
- Edit files locally.
- Commit changes and push to git remote.
The git push will trigger a CI/CD pipeline, which in turn builds and deploys your code as a new release.
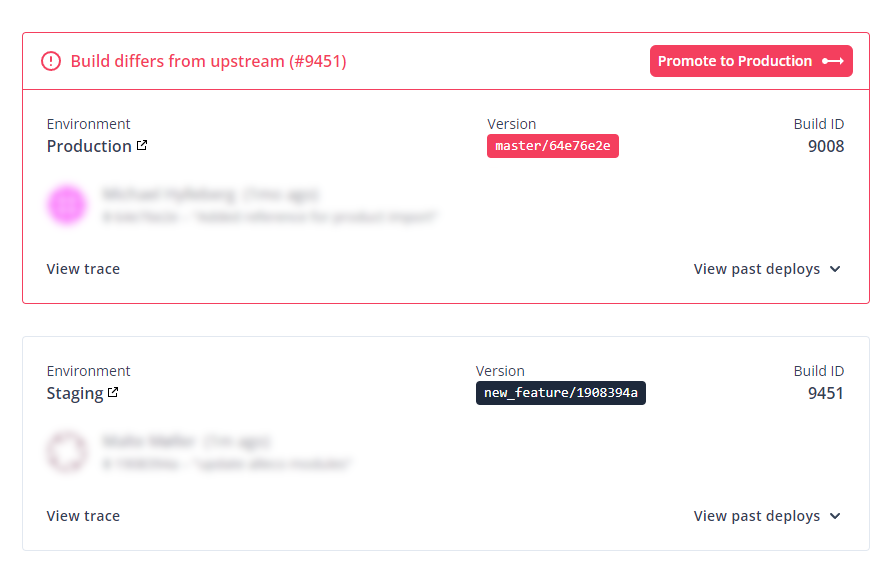
Note: When you push a new commit, only the "staging" environment is updated. In order to update the production environment, you need to "promote" the build through the Site Dashboard.
Set up local workspace
If you're starting a new project you can simply clone the remote repository, which will automatically set ProperHost Cloud as the upstream server.
git clone <git-clone-url> /projects/your-website-name
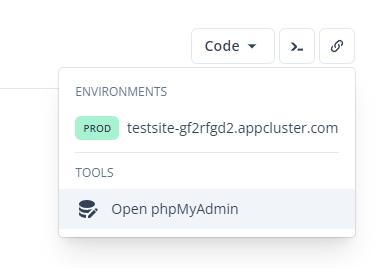
You'll find the git-clone-url within your Site Dashboard by clicking on the "Code" dropdown button. There's both an HTTPS and SSH option available.
Alternatively, if you already have a project you want to migrate to ProperHost Cloud you can do the following:
cd /path/to/project
git init #skip if you're already using Git
git remote add origin <git-clone-url>
git pull origin master --allow-unrelated-histories
This will add the ProperHost repository as a new remote and sync it with your workspace. If you already have an existing remote named "origin", you can name it something else like "properhost" or "production".
Deploy with Git
Once you're ready to deploy a new release, simply commit your changes and run git push:
git add -A
git commit -m "Description of the changes"
git push -u origin master #replace "master" if you've customized the upstream name
This will trigger a new build and you can follow the status in the web UI. You may further extend this process using your favorite git development workflow, such as feature branching and tagging. By default, every push regardless of tag/branch will trigger a deploy.
Persistent directories (media files)
While the application code is stored in Git and deployed as part of the CI/CD build, the following folders are excluded through the .gitignore:
./pub/media # static assets and image files
./var # cache, session files, etc.
Especially the "media" folder can grow to 10's or 100's of GB's, which doesn't make sense to store in Git. There are also certain files that needs to be updated on the live site, such as the cache, sessions, etc.
The above folders are treated specially by the platform as they are backed by a persistent disk, unlike the container filesystem which is ephemeral. That means that files created in the above folders are not affected by a container restart.
You can use sftp or rsync to upload files to these directories, for example if you're migrating an existing site and need to upload a bunch of product images. You can also use the web terminal feature to open a shell-like terminal into the running container and manipulate the files through standard Unix commands.
Manage the database
When you created the site, the platform automatically generated a database in the background and populated the application config with a randomly generated username and password.
To find the database connection details you can inspect the app/etc/env.php file. (Please note that this file is managed by the platform and should not be edited manually.)
We provide two ways by which you can manage your database:
-
phpMyAdmin: the popular web administration interface for MySQL is automatically installed together with your site:
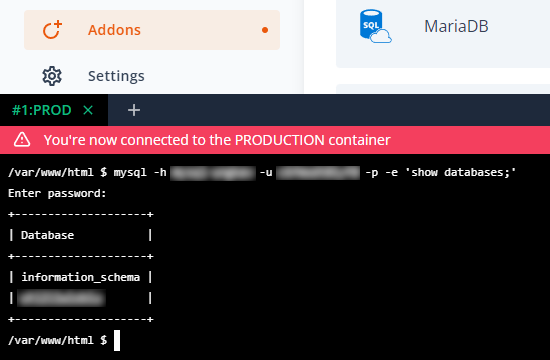
-
MySQL CLI: the MySQL command-line interface tool allows you to write SQL commands, run database imports/exports, and a lot more.
Advanced
Pre-deploy hooks
As part of the automated deployment workflow, the following steps are executed:
- Run
setup:db:upgradeif there are pending DB changes (e.g. module updates) - Run
app:config:importto import config changes from "app/etc/config.php" - Clean Magento cache
- Enable Magento production mode
This ensures that any required DB schema changes or configuration updates are applied before the container starts.
Environment variables
ProperHost Cloud allows you to customize certain aspects of your Magento installation using environment variables. These variables are decoupled from your code and can be modified at runtime to avoid having to re-deploy the application in order for the change to take effect.

The following variables are supported:
| Variable name | Description |
|---|---|
| MAGE_BASE_URL | Sets the default store base url |
| MAGE_DB_TABLE_PREFIX | Sets a custom database table prefix |
| MAGE_BACKEND_FRONTNAME | Sets a custom admin URL path |
| MAGE_CRYPT_KEY | Sets the Magento encryption key |
| MAGE_SESSION_SAVE | Sets the Magento session store (redis|db|files) Defaults to redis if Redis addon is enabled, otherwise files |
| MAGE_DISABLE_2FA | Disable backend 2-Factor authentication (true|false) |
| MAGE_PRESERVE_CACHE | Disable automatic cleaning of cache after deploy (true|false) |
For example, if you're importing an existing site you may set a custom database table prefix and encryption key using the variables MAGE_DB_TABLE_PREFIX and MAGE_CRYPT_KEY.
Multi-store configuration
You may create domain mappings for different Magento websites/store views under Settings > Magento Multistore in the Site Dashboard.
Add one mapping per line followed by a semi-colon like the example below:
# format: <hostname> <code>[,<type>];
# map requests for magento.com (including subdomains such as www.magento.com) to the store view 'us_store'
.magento.com us_store; # MAGE_RUN_TYPE defaults to 'store'
# map requests for magento.de to the website 'de_store'
magento.de de_store,website; # MAGE_RUN_TYPE explicitly set to 'website'
If you omit type it will default to "store" (store view). The hostname may be prefixed with a . (dot) to also match on subdomains (e.g. www.).
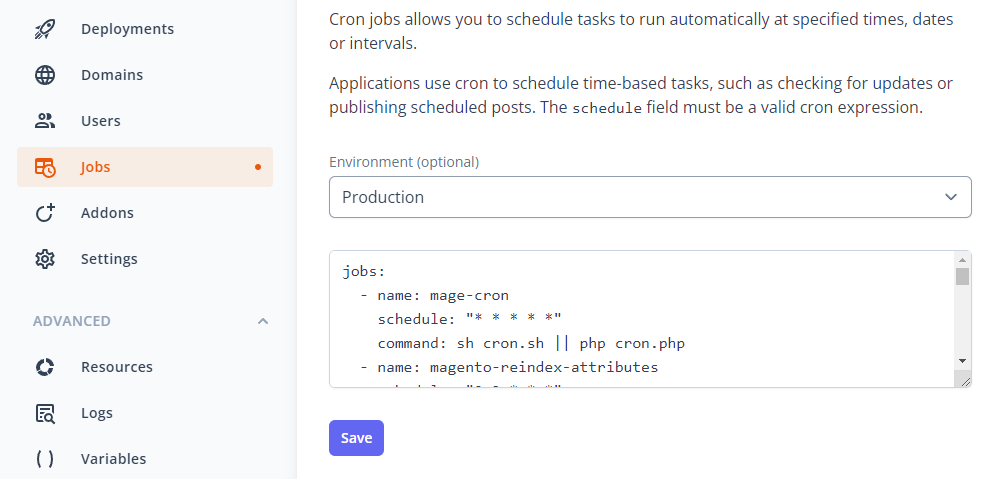
Cron jobs
The platform automatically configures the default Magento cron job. You can change the schedule or add additional jobs from the Site Dashboard.
Admin tools
The following command-line utilities are included in the container image:
- n98-magerun2 (alias: magerun) is a command-line interface for Magento 2.
- mysql-cli allows you to run commands on the database.
Summary
In this tutorial we've created a new Magento 2 site on ProperHost Cloud, then we learned how to use Git to automate our deployment workflow. The platform's built-in CI/CD system automatically took care of building the container image and updated our staging site. Using the "Promote to production" feature within the Dashboard we rolled out a new release to production with the click of a button.
We've also learned how to work with static assets and persistent folders, and how to manage the database using phpMyAdmin and the MySQL CLI tool.
If you want to try out ProperHost Cloud today, you can sign up for a free account here!